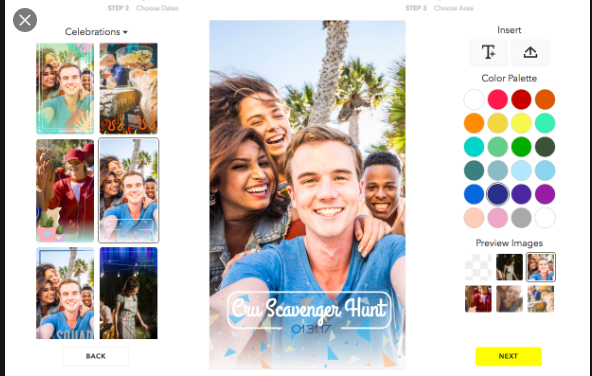
Snapchat is a popular social media app where you communicate with your friends through live videos and photos. Your pictures say a lot about you and are the best way to express yourself. Snapchat gives you a platform to let people into your world so they can view what you’re doing at any particular point in time. To make it more fun, you can add several filters to your snapshot or video and we will be discussing the Geotag filter in this article.
Snapchat geotags are simply fun images and text overlays that appear on top of a section of your photos or videos, sort of like a sticker. Adding a Geotag filter in Snapchat depends on your location, there are already customized ones for every location. But do you know it’s possible to make your own Snapchat Geotag and submit it for approval?
Not all locations have them,
so if you come across a location that could use a geotag, then you can certainly make one for it. But you need to first double-check that the geolocation feature that Snapchat needs to access your location is turned on. From the camera viewer in the Snapchat app, tap the ghost icon at the top and then tap the gear icon on the top right to access your settings. Then tap the ‘Manage’ option and make sure your Filters button is turned on.
Submitting a Snapchat geotag filter is really simple. It’s creating the image that’s probably the hardest part, mainly because you need to have some basic graphic design skills and a design program to help you do it.
Creating Your Snapchat Geotag
It’s highly recommended that you use a professional design program like Adobe Illustrator or Photoshop to create your Snapchat geotag. In fact, you’ll notice that once we get to the map page for the Snapchat geotag submission, Snapchat will give you the option to download templates for both Illustrator and Photoshop. Some other free tools online like Canva don’t offer as many features as some of the others, which we’ll need to use for our geotag images to be submitted. According to Snapchat, all submissions must:
- be 100 percent original;
- have a width of 1080px and a height of 1920px;
- be saved as a web-optimized PNG image; and
- be less than 300KB in size.
This is easy enough to do if you have Illustrator or Photoshop and know how to use it. Free tools like Canva, however, will give you images that will need to be edited further using something like the default photo editor that’s installed on your computer, which should allow you to resize and further edit your images.
Make Sure Your New Snapchat Geotag Follows All the Guidelines
It’s recommended to check out Snapchat’s detailed list of guidelines to make sure your geotag image is in line with all of them. For example, you can’t submit logos, trademarks, hashtags, or photographs according to the guidelines.

How to Make a Snapchat Geofilter for Any Event in 2020 – G2
https://learn.g2.com › how-to-make-a-snapchat-geofilter
Learning how to make a Snapchat geofilter is easy! We’ll walk you through the steps of creating a Snapchat geofilter, plus the ideal
How to Make a Snapchat Geotag – Lifewire
https://www.lifewire.com › Social Media › Snapchat
Turn on geotags: Go to the camera viewer, tap the ghost icon, tap the gear icon, tap Manage, and turn on Filters. Create a geotag: Upload an …
How to Make a Snapchat Filter in 3 Easy Steps – MakeUseOf
https://www.makeuseof.com › Social Media
Learn how to create your own Snapchat filter! … it another great choice for making filters. Regardless, Snapchat offers the following submission tips
How to make Snapchat filters: Create custom event geofilters
https://www.pocket-lint.com › … › Snapchat app news
Here’s everything you need to know about creating Snapchat filters. What is a Snapchat filter? The first thing you should know …
Use the Map Tool to Submit Your Geotag
- Now that you’ve created your geotag image and made sure it satisfies all the guidelines, you’re ready to submit it. Visit Snapchat.com/geofilters to do that.
- Click let us Do It! and then click NEXT on the following page. You’ll be shown a map. You can either let Snapchat know your location or use the search bar to type in a location.
- Now you can click on any area of the map where you want your geotag to show up. Move your mouse over and click again to secure another corner. Do this as many times as you need to trace the area you’re targeting.
- Once you’ve selected an area, you can click the big plus sign-in box to the right so you can upload your geotag image. Scroll down to add your name, email address, its meaning, and any additional notes. Confirm that it’s your original work, agree to the privacy policy, prove you’re not a robot, and then hit submit.
After you’ve successfully submitted your geotag image, you’ll be sent a confirmation email telling you that it will be reviewed in the order it was received. If it gets approved, you will also receive a notification from Snapchat.


